Sunday, March 23, 2014

Dwalin goes to Megacon 2014

#Megacon2014 #Dwalin #TheHobbit #Cosplay

So we finally woke up on the second day of Megacon 2014 and started the preparations for my outfit. We decided to make the hair over the ears to the sideburns, beard and mustache from scratch rather than go with the pieces that my wife had made earlier with crepe wool and homemade latex. This worked out to our benefit, aesthetically, but we also added 2 hours to the prep time.


As you can see in the first picture, we started the head tattoo as well. That gave us some issues since the suggested parchment paper templates that my wife drew out in advance didn't transfer the gel pen very good at all. Like a trooper, she didn't give up. Instead, she drew them free-hand on regular paper, applied them to my head and off we went. Truly an amazing woman under pressure.


Last touch. A quick tattoo on the hands referenced from what pictures I could find of Dwalin's hands. Next year, I will craft the knuckle dusters


Dwalin at Megacon 2014.


An awesome Thranduil for a photo op. He was one of the few around me that was tall enough to notice the head ink.


These were some real fun gals that were excited to find a Dwalin. Our meeting must have been written in the stars.


And then Thranduil came back to join us although he was a bit suspicious of Thorin, at first. It is especially fun when cosplayers act in character. Most people got my name right the first time, however I did get asked if I was Gloin once. Obviously, my reply was, "Dwalin. At your service." (Followed with a short bow from the waist and of course, with a dwarvish accent.) Good times!

All in all, getting ready for this convention was a blast. I was only in costume for roughly 2 to 3 hours but there were a lot of pictures taken and quite a few compliments. I want to give credit where credit is due, though. My wife made all of Dwalin's clothes from scratch. We bought a piece of faux fur for my shoulders. She rigged the harness and I only helped with a few strategic connections. I made the belt buckle, chest piece, small harness buckles and axes. So, I could not have done it without her help. Thank you Becky! And without further ado, my wife and daughter from this year's Megacon: Dr. Abigail Redcroft and zombie Alice in Wonderland!


We have already started planning for next year. I will be doing Dwalin again but we will be making some refinements. My wife is considering going as Balin so I would have a brother at the con! There are better picture-taking opportunities when others of the same genre or even franchise are present.

If you haven't been to a convention like this one or one of the other many types of cons out there, I would strongly suggest attending. You will be overwhelmed, amused and maybe even awed at times but you will most assuredly enjoy yourself. Who knows? You might even decide to dress up one year. But beware. It is wicked addictive. And I mean wicked....addictive. Have fun!

Sunday, March 16, 2014

Building a Tolkien Dwarf part 2

Moving forward and with only one week until Megacon, I continued my work on the axes while my wife put the finishing touches on the outfit. The harness came out real good for our first time. I was actually dreading the harness but she made it look easy. I assisted with the leather work here and there as well as threw in a couple of ideas for termination points for the straps.

Front and back view

The harness was made with 3 belts, some leather and raw hide strips for lashing everything together. I carved wooden buckles and the center piece for the harness and then hit them with the hammered metal paint. I unfortunately did not take a pictures of the painted chest piece but you can see it if you blow the front view picture up.

The belt clips


I also needed to finish the main belt buckle which was a bit more intricate. The buckle that Dwalin wears in the movies looks like individual pieces of metal melded together. I used a pencil and drew the design  on the piece of particle board that I had already carved out based on the best pictures I could find of the buckle. Once that was done, my friend the Dremel and I hit the patio for a serious grinding session.

Before paint


Painted


Needless to say, I was pretty happy with the way this turned out. It fits perfectly over the weight belt which I use for the harness base.

Now it was time to tackle the axes. I already had the heads done and had been waiting on my maple dowel to get here. Luckily, it shipped on time so I proceeded. I will be honest. I asked around a lot before I decided on a specific plan for this project. My biggest dilemma was getting the 5/8" thick ax heads through a 1-1/2" dowel AND have the dowel core-drilled to accept the haft base. The haft base dowel was 7/8" so I picked up a 7/8" spade bit at the store and commenced the marking, drilling and cutting.

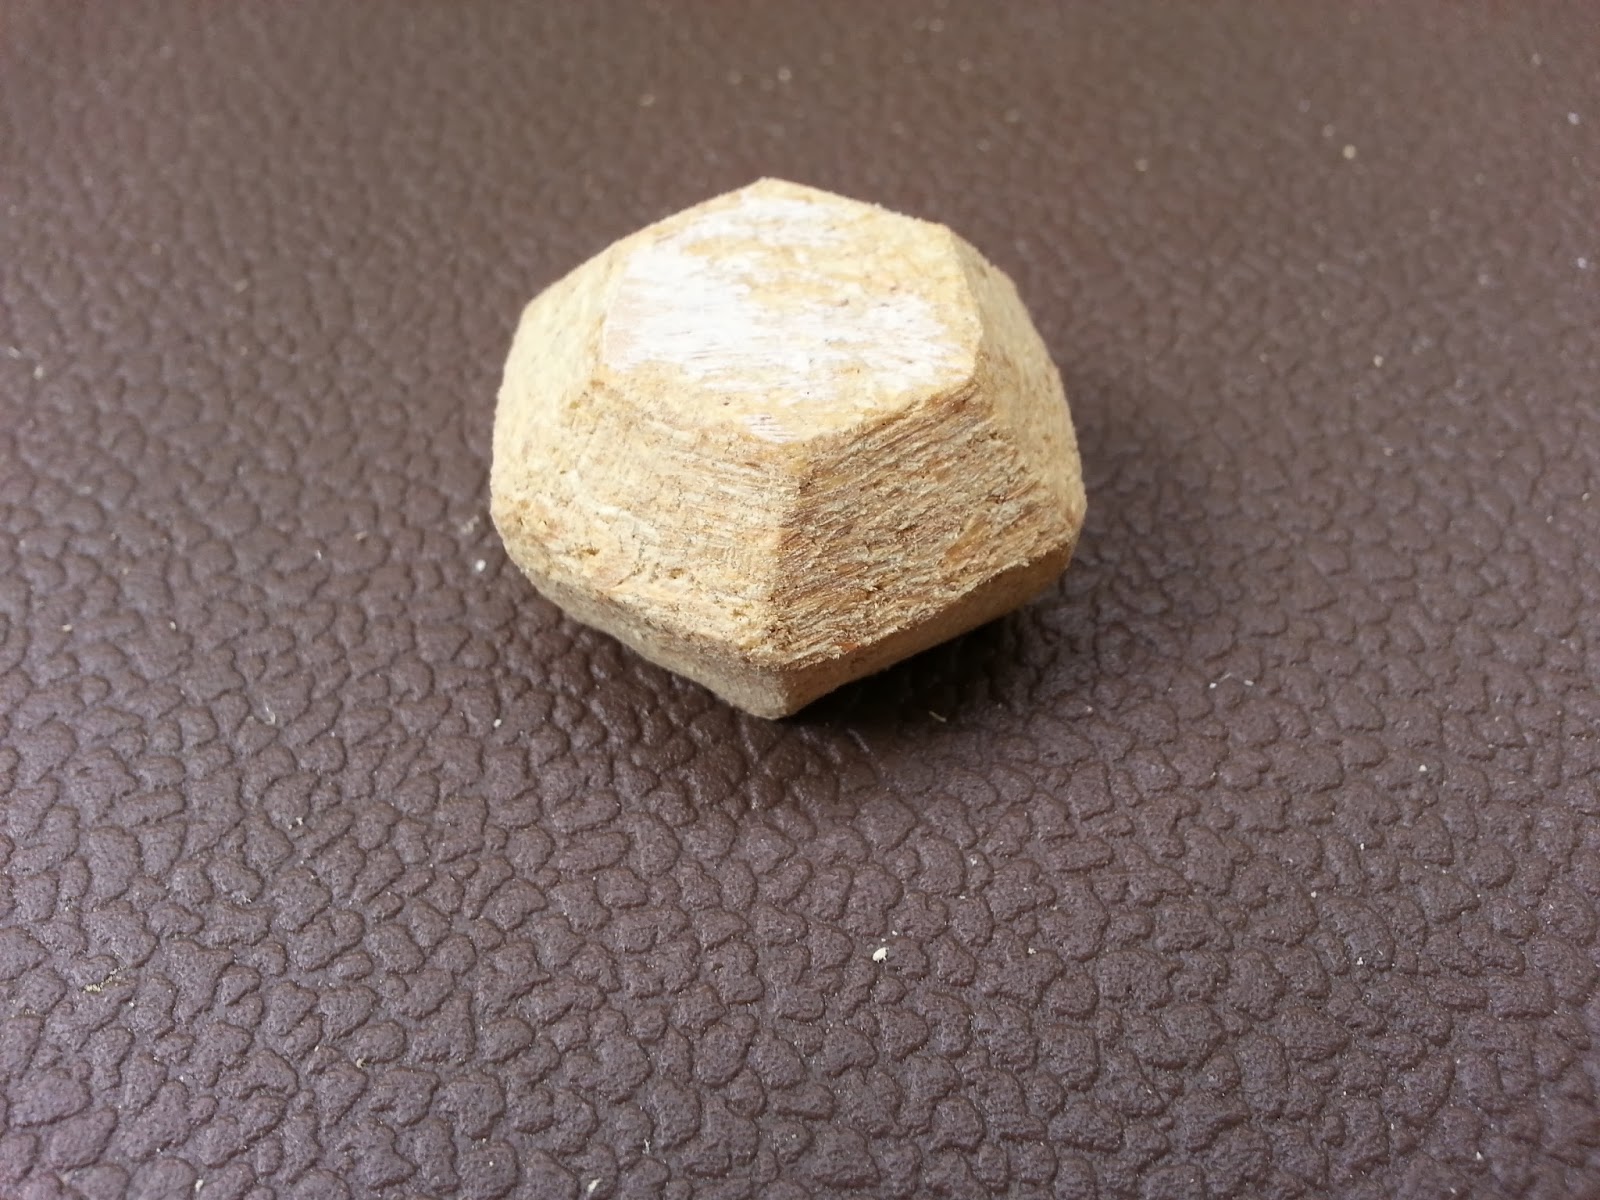
Maple dowel marked for core depth and length


As you can see in the picture above, I marked a depth that I thought would be adequate on the right. I also marked the total length right around 10". With that done, I then marked two spot that I would be drilling for the ax heads. Basically, my plan was to drill two holes through the dowel where the top and bottom edges of the ax head would be. This would make the final fitting better since the ax heads have beveled edges. Also, I marked a line through the top hole since I would be cutting the top section of the dowel off and using it as a cap later on.  I also marked the wedge that I would be cutting out.

Holes drilled now for the cutting


Once the two set holes were drilled, I started the core drilling. This required me to hold the dowel as steady as possible while drilling into it lengthwise. I do not own a workbench nor do I own any clamps. So it was not an easy task, but I bought a new bit for this and it worked perfectly. I drilled down to my depth mark on the dowel and then flipped the dowel over and cut the wedge out with my jigsaw.

Core drill complete


Wedge cut out and cap cut off


 Once everything was cut and drilled, I slid the ax head into the slot, did some fine tuning on the cap with the Dremel and set up to drill the cap and ax head. With the cap seated in place, I drilled down the center of the cap and into the ax head. Once I cleaned the hole out, I tapped a dowel pin down into the hole to finally make the ax head and upper haft one piece. When I repeated this procedure on the second one, the cap split unfortunately. I was able to salvage it, however, so all was not lost. Plus, I had about 12" of the maple dowel left just in case. For a finishing touch, I put wood putty into the seams where the ax head met the upper haft and let it dry. Later, I would sand away any rough spots to get ready for final paint. Oh yeah, I almost forgot. I also used the Dremel to make the upper hafts octagonal. I felt that the angles would set off the top of the ax pretty good. To finish, I faceted the cap as well.

Ax head fitted into the newly cut slot


Wood putty around the connection of ax head and upper haft


 Now I needed to get the smaller dowels ready for the final connection. I bought some cheap stain ($4) and stained the dowels a deep, rich brown. Once they dried, I glued the carved pommels to the base and wrapped the lower haft with leather straps. I used a small finish nail where the leather stopped on the haft.

Lower haft with wrapping and pommel


My plan for connecting the upper and lower haft sections was similar to the connection of the ax head and haft. I was going to use a dowel pin after drilling a hole through the two pieces. I slid the smaller haft inside the upper haft and then drilled a hole through where the two met (about 2" in.) I then tapped a dowel pin into the hole and voila!

Now, here is where the fun began. At some point, I had taken a break and worked on some other pieces (call it ADD if you want, I call it rapid sequencing.) When I arrived back to this point, I inserted the lower haft into the upper haft and drilled the hole as I did with the first one. Ugh. I swear a gremlin must have jumped onto my patio and planted an extra drill bit on my work surface. After I drilled a pilot hole, I grabbed what I thought was the proper drill bit and secured it in the drill.

Sadly, seeing your dowel pin slide right through the hole you just drilled really, really sucks. After mimicking Yosemite Sam for a few minutes, I decided on a plan of action to overcome this little issue. I used the Dremel on a spare piece of 7/8" dowel and carved myself a custom dowel pin to fit in the over-sized hole. Crisis averted! I apologize but I did not take any pictures of that process because of my lovely faux pas.

I applied a final coat of paint and then etched in the dwarven runes. I chose to go with the same runes that the WETA prop axes had on them. WETA made all of the props for the movies, by the way. If you get a chance, look them up. They sell replicas and statues from the Tolkien movies.

To be honest, this was a journey. I learned so much and I'm very grateful for that. If I were to pick my favorite part of this whole experience, I would have to say that using the Dremel to create things was the most satisfying. Without further ado, here are some pics of the final pieces. I will only be doing one more thing to them this week and that is using a wood burner to do some fine etching around the edges. Nice, relaxing fun.


We will be shooting some pics on here of the whole costume next time. See you then!


Tuesday, March 11, 2014

Building a Tolkien dwarf

The Hobbit. In the fantasy genre, The Hobbit was one of the most influential books. The Lord of the Rings trilogy, as well. Nowadays, new movies have been made to showcase the beauty of Tolkien's work. The movies do not follow the books exactly but that is the norm for the transition to the big screen. I thoroughly enjoyed them.

I took my latest cosplay idea from the latest Hobbit movies and have enjoyed every second of it. I mean, who doesn't like the idea of a battle hungry, axe-wielding, beer-guzzling BALD dwarf? (No show of hands, please. I won't acknowledge you with all of your negativity.)

Dwalin is a pretty cool looking cat, in my opinion and with my natural baldness, it was a no-brainer for a cosplay choice. The process has been a bit trying due to money, time and design issues but I finally made some headway when I discovered cold porcelain thanks to a good friend. Cold porcelain is a non-toxic, homemade modeling clay of sorts that air dries reasonably quick, accepts paints, sanding, clear coats, etc. and is super easy to work with. I initially started making the accessories out of the porcelain and then deviated to particle board. Particle board is basically fine wood chips pressed together and used for inexpensive furniture, for example. Besides the price tag, I did find that the cold porcelain did not sand down very good with the Dremel sand paper wheel. Either method is cheap, however, if you live in an apartment complex like I do and aren't afraid to root through the designated "used furniture deposit area", there is plenty of used wood to be found. I purchased the cheapest Dremel that I could find (around $29 at Walmart) and started carving. Note: I also have a hand-me-down jigsaw that I use to cut out basic shapes and then I refine with the Dremel.

Dwalin's axes are called Grasper and Keeper or Ukhlat and Umraz in Khuzdul. I am recreating these myself since a production pair from molds from the movie production company cost between $299 and $500. Yeah, not going to happen. I struggled in the beginning because I really had nothing at my house to use for these. I watched countless videos, read articles and did research.

Ax Template


My first ax head was made from a piece of stiff garden foam. I bought a sheet of it at Walmart, drew a template, cut the shape out of the foam and then sanded the ax head to the shape that I needed. Then, the dreaded mistake of the entire process. I sprayed clear coat on it. What was I thinking exactly? Who knows? Anyway, when I went out to my porch to see if the ax was dry, it wasn't there. Where the ax had been there was now a puddle of green goo. Cool! I'm inquisitive so I went over and poked the puddle and found it to be rock hard and practically cemented to the concrete deck of the porch. Clean up is never fun especially after a failure.

Almost a good idea


So, with the head of the axes turning into a dilemma, I turned to the ax hafts. I went the easy route and bought some cheap 7/8" dowels in the craft section of Walmart. I also bought some cheap leather scraps from a local leather store (Tandy Leather.) With those pieces purchased, I created the rough pommels from the particle board. This part is where the Dremel came in very handy.

Ax Pommels


Finished pommels and the beginning of the leather harness chest piece


My wife finally suggested that I use one of the spare shelves that we had in the house for the ax heads. They are made of particle board and cut pretty easy with a jigsaw. Needless to say, once she suggested that, I didn't stop until I had two functional ax heads. Now the dilemma was how to attach the haft to the ax head. There is a larger cylindrical section of the ax that the haft and the ax head slide into. As limited as I was with tools, I mulled the design for awhile. I finally asked a craftsman friend at my work and he gave me a great suggestion. A quick side note: utilize your resources!! Ask questions from multiple people. We live on a rock flying through space where up and down is not relevant and there are billions of people. Someone out there has an idea for you.

The transition of shelf to weapon head


Ax head painted with Hammered Metal spray paint, engraved dwarven runes colored black.


With the axes out of the way for the moment, I needed an outfit. My wife wanted a sewing machine so I purchased one (again, Walmart.) With the Singer in her hands, this woman is a maestro. Within a couple days I had fur-topped boots, pants, under shirt, tunic and fur throw for my shoulders. Beast!

Then, she bought a bald cap put it over my head and then drew some guide lines for the fake hair we would be applying. We bought some crepe wool which is used by many to produce fake hair, beards, etc. She wet it during the night and let it hang dry over night which stretched it a bit and made it more receiving to a comb. She ended up buying a cheap wig just in case the crepe wool didn't come out right. Although I was happy with the first version, her second version was easier to work with and looks a bit better.

In my next entry, I will show the hair, the separate pieces of the outfit and the continuing saga of the axes, Grasper and Keeper.

Saturday, March 1, 2014

Cosplay for the first time

I remember my first convention or "con" as they are called by many. Megacon in Orlando, the year, 2012. My wife and I attended on a Saturday and it was packed. Apparently, Saturday is the busiest day of the 3 day convention but we weren't complaining.

There were literally thousands of people, many of them dressed in costumes. As we entered the main hall, we stopped to watch R2-D2 and C3P0 do a little show as the crowd parted to give them room. Moving further into the convention our senses were assailed and overwhelmed. Fans of comics, science fiction, fantasy and anime were everywhere, colorful and loud. The smell of what can only be described as "fair food" hit us but food was the last thing on our minds.

When we finally got past all of the panel rooms that were full or filling up quickly, we found the main entrance into the vendor's hall. There was a large open area with midget wrestling in the corner and a special autograph booth for the venerable Stan Lee. Veering to the right we entered the main hall and started looking at the different booths.

The wares for sale varied greatly. On one table was a collection of hundreds of bladed weapons, throwing stars, maces and cudgels. On another we found anime cards by the 10's of 1000's. That particular vendor was dressed as some Manga character. I must admit, I do not read anime so I would be unfamiliar with any of the characters but I had to admire her for her efforts.

As we plodded through the dozens and dozens of tables, I looked around at the crowd. Everywhere you looked, there were costumes. As a matter of fact, at least 50 percent of the crowd was in costume at that point in the day. At this point, my wife and I started talking about the costumes, how cool they were and what fun it must be to make one. And most of these costumes were hand-crafted by the people wearing them. We looked at each other and an unspoken shared idea was formed. We would dress up on the following year!

Spin the calendar ahead a full year and we found ourselves entering the same halls of chaos. But this time, we had a different level of excitement. For now, the crowds were looking at us. My wife and I had chosen a genre of costume play called "Steampunk." There are variations of this genre but we really wanted to go with the Victorian theme.

As you can see, we were pretty happy. We handled the accessories as far as fabrication and bought the clothes. My wife did some alterations to her clothes and I included a fake beard and a gear covered cane. We received a lot of compliments on our costumes and had an amazing day.

This year, my wife decided to stay with Steampunk but I have veered off into the realm of Middle Earth and the Hobbit. The biggest difference is that this year, we bought a sewing machine and my wife has made all of the articles of clothing, including boots. It is going to be a fantastic year and I look forward to posting pictures including step by step procedures on some of the crafting. Cheers!